A.
Instead of switching TOP screens via object actions on the HMI, you can configure the screen change function based on PLC address values.
Follow the steps below to set up this feature:
1. Open the project file in TOP Design Studio, then go to [Project] - [Property] from the TOP menu.
2. In the [Project Option] window, navigate to [TOP Setting] - [Screen Change].
3. Check [Use Screen Change], then configure the [Write Screen Num (HMI->PLC)] and [Read Screen Num (HMI<-PLC)].
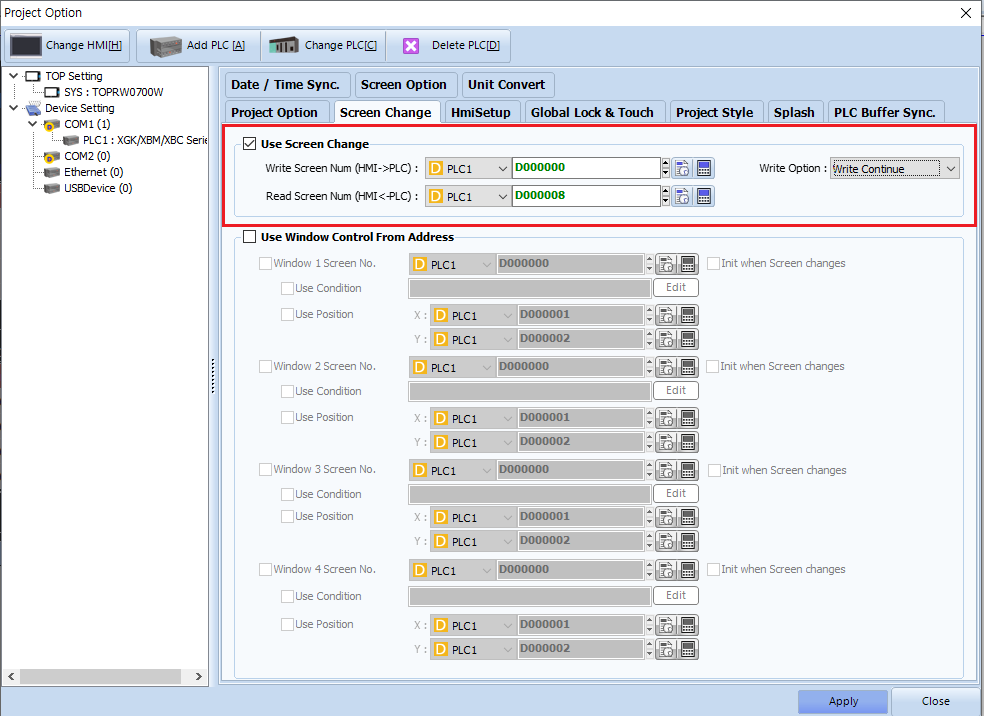
# Write Screen Num (HMI->PLC)
This function writes the current screen number from the HMI to the specified PLC address after a screen change.
For example, if D0 is set as the [Write Screen Num] and the current screen on the TOP is No. 3, then the value 3 will be written to D0.
This function writes the current screen number from the HMI to the specified PLC address after a screen change.
For example, if D0 is set as the [Write Screen Num] and the current screen on the TOP is No. 3, then the value 3 will be written to D0.
# Read Screen Num (HMI<-PLC)
This function reads a screen number from the specified PLC address and switches the HMI to that screen.
For example, if you write the value 7 to D8, the TOP HMI will read this value and switch to screen No. 7.
After switching, it will also write 7 to the write address (e.g., D0) to reflect the current screen number.