A.
This guide explains how to configure a barcode scanner for use with the TOP HMI, depending on the connection method (USB or Serial).
1. If Using a USB Barcode Scanner
When a barcode scanner is connected to the USB port of the TOP HMI, you need to configure it in TOP Design Studio as follows:
When a barcode scanner is connected to the USB port of the TOP HMI, you need to configure it in TOP Design Studio as follows:
1) Launch TOP Design Studio.
2) Go to [Project] - [Property] to open the Project Option window.
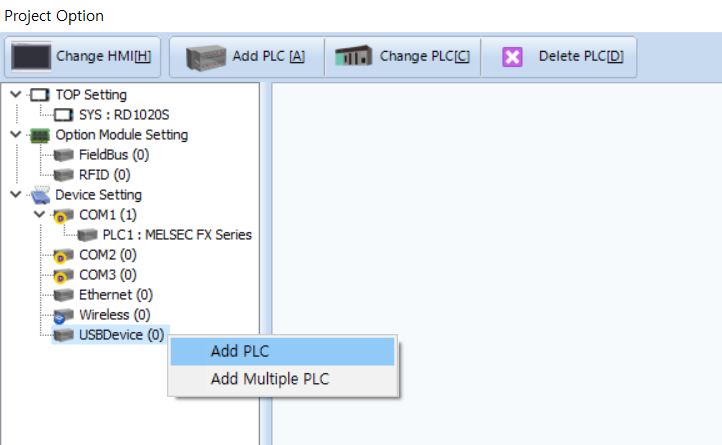
3) Select [USBDevice] from the left menu, and click [Add PLC] to add [USB Barcode].
2) Go to [Project] - [Property] to open the Project Option window.
3) Select [USBDevice] from the left menu, and click [Add PLC] to add [USB Barcode].
4) Once added, select [USB Barcode] to access its configuration panel on the right.
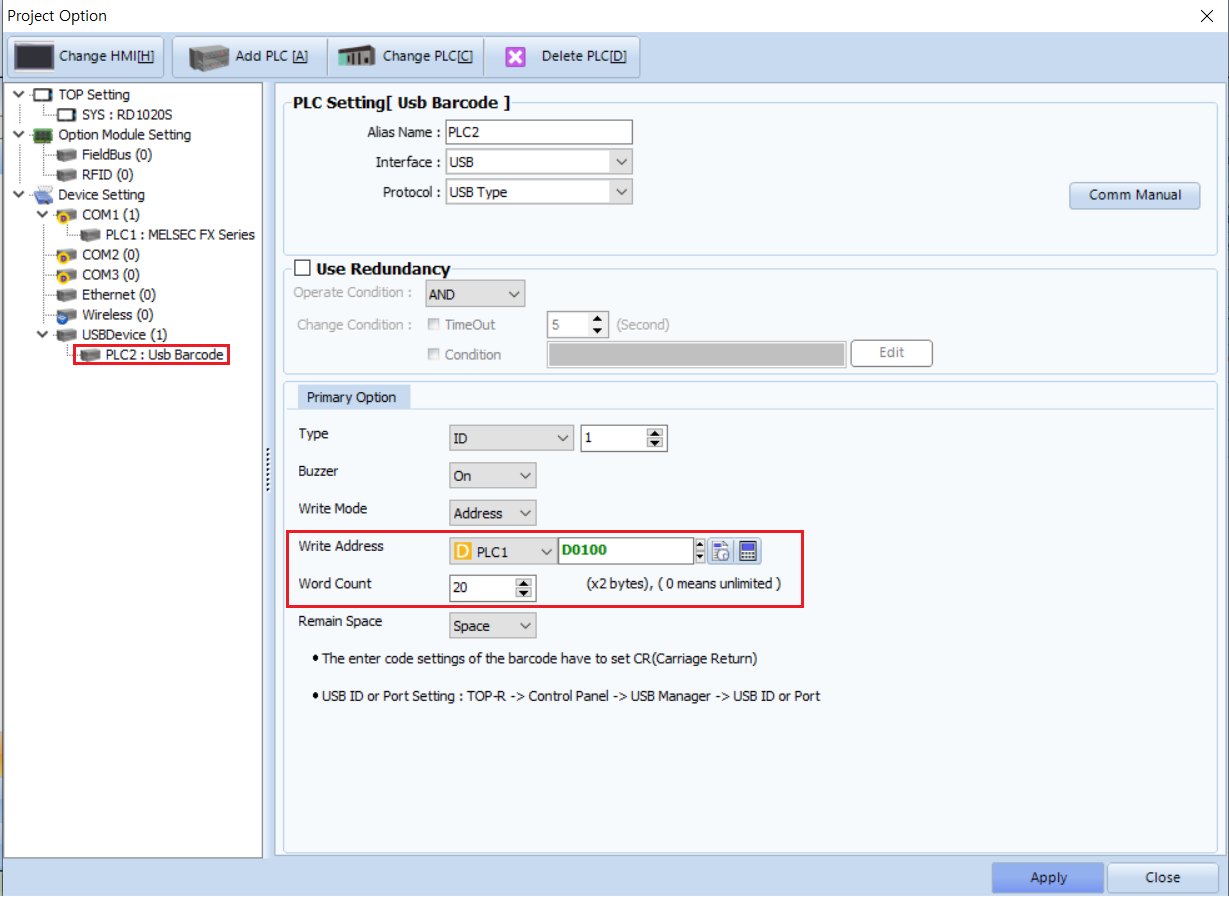
[USB Barcode Configuration]
- Write Address: Enter the PLC address where the scanned barcode data will be written.
- Word Count: Set the number of word addresses needed to store the barcode data.
- Write Address: Enter the PLC address where the scanned barcode data will be written.
- Word Count: Set the number of word addresses needed to store the barcode data.
* Note: Each word (16-bit) can store 2 characters.
Ex) If the barcode contains 40 characters, set Word Count to 20.
Ex) If the barcode contains 40 characters, set Word Count to 20.
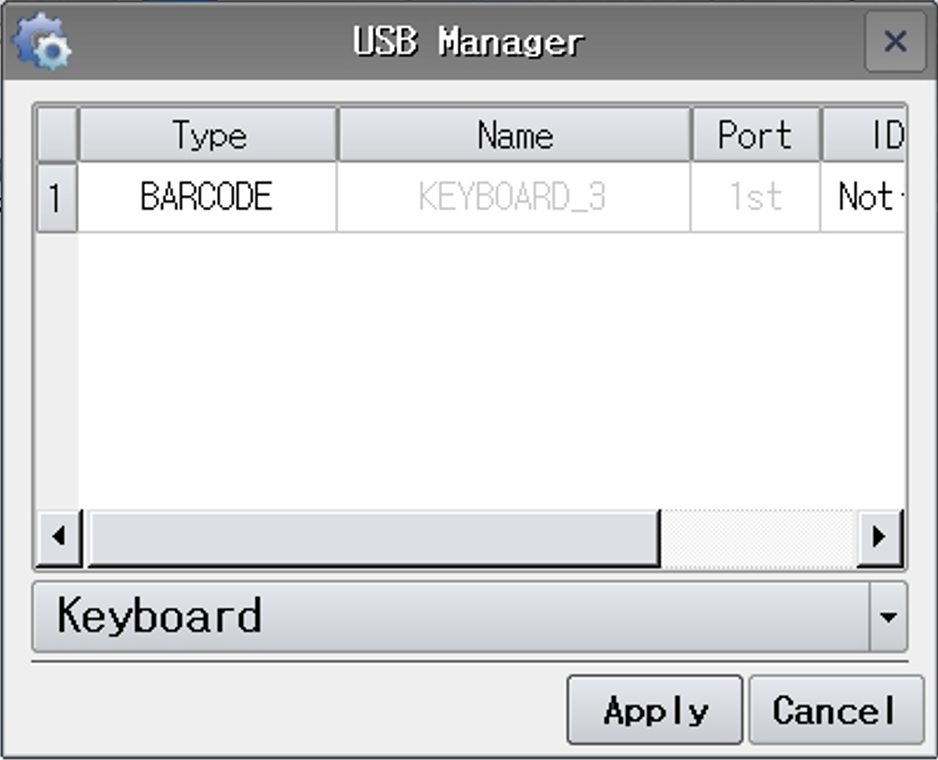
2. Setting the USB Barcode ID on the HMI
1) On the HMI device, press the [Exit] button on the top menu to enter the system menu.
2) Go to [Control Panel] - [USB Manager].
3) Set the ID for the connected USB barcode scanner.
1) On the HMI device, press the [Exit] button on the top menu to enter the system menu.
2) Go to [Control Panel] - [USB Manager].
3) Set the ID for the connected USB barcode scanner.
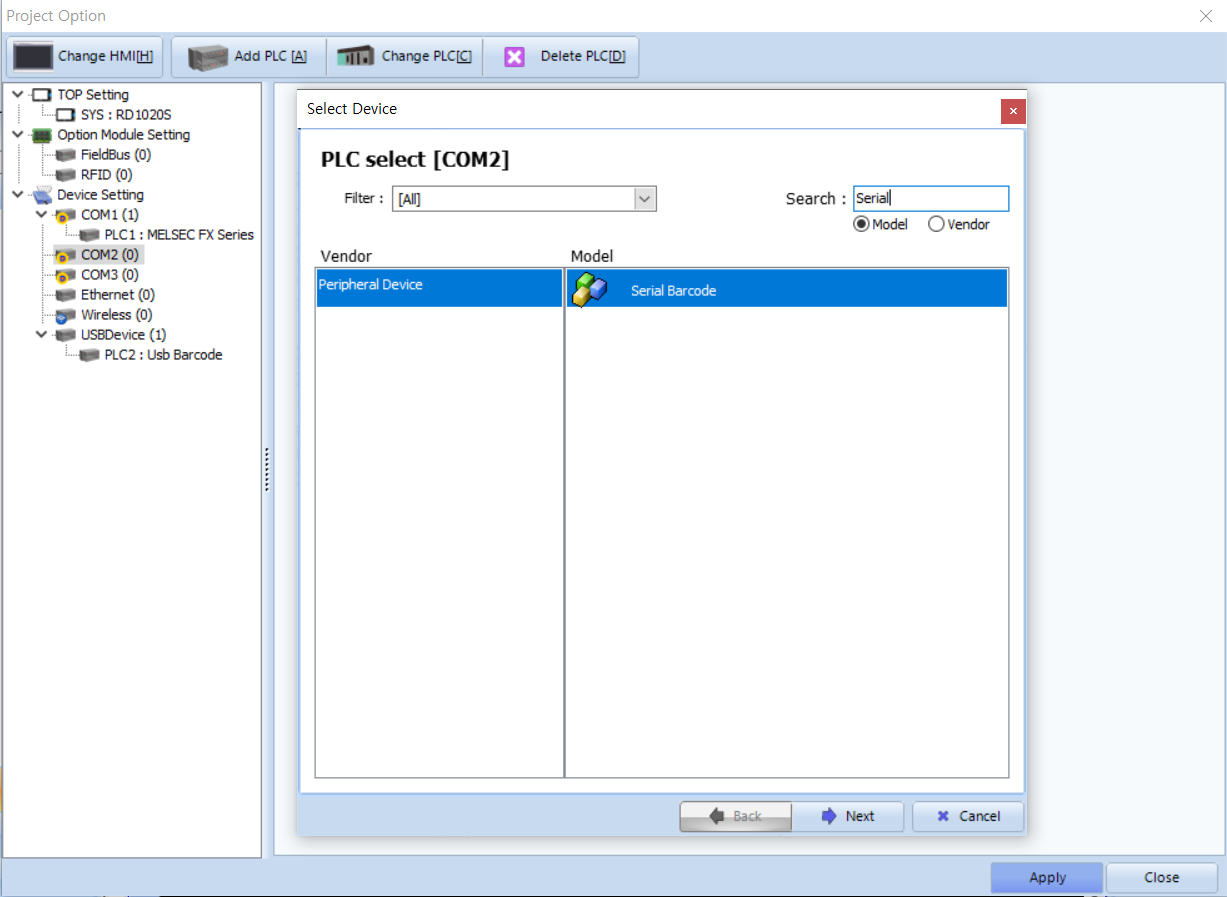
3. If Using a Serial Barcode Scanner
1) In TOP Design Studio, add a new device via the serial port by clicking [Add PLC].
2) Set the following:
- Vendor: Peripheral Device
- Model: Serial Barcode
3) The remaining settings (Write Address, Word Count, etc.) are the same as for USB.
1) In TOP Design Studio, add a new device via the serial port by clicking [Add PLC].
2) Set the following:
- Vendor: Peripheral Device
- Model: Serial Barcode
3) The remaining settings (Write Address, Word Count, etc.) are the same as for USB.